Choosing the right Led Light Curing Device requires more than comparing brightness numbers. A reliable choice begins with clinical purpose, material compatibility, and daily working conditions. In restorative dentistry, the device must deliver suitable wavelength and stable irradiance for the composites being used. A powerful lamp is not automatically a better lamp. Excessive heat, uneven output, or poor beam coverage can create avoidable risks.
Dr. Richard Price, a respected dental biomaterials researcher, has emphasized, “The light curing unit is the most important piece of equipment in the dental office.” His statement reflects practical experience. A curing device affects polymerization, restoration strength, marginal adaptation, and long-term clinical confidence. Readers should examine independent performance data, not only manufacturer claims. Check the spectral range, irradiance consistency, curing depth, timer accuracy, battery life, and infection-control design. A radiometer can reveal problems that remain invisible during routine use.
Small details matter.
For example, a narrow light tip may miss the edge of a wide molar restoration. A weak battery may reduce output during a busy afternoon. An uncomfortable grip can also encourage rushed positioning. These points are easy to overlook. I would not claim that one Led Light Curing Device suits every clinic. Material formulas, operator habits, and maintenance routines differ. Even a careful checklist can miss real-world behavior. Therefore, test the device with your own materials, record its output regularly, and review results with experienced clinicians. The best decision combines published evidence, hands-on evaluation, and honest reflection about what your practice actually needs.
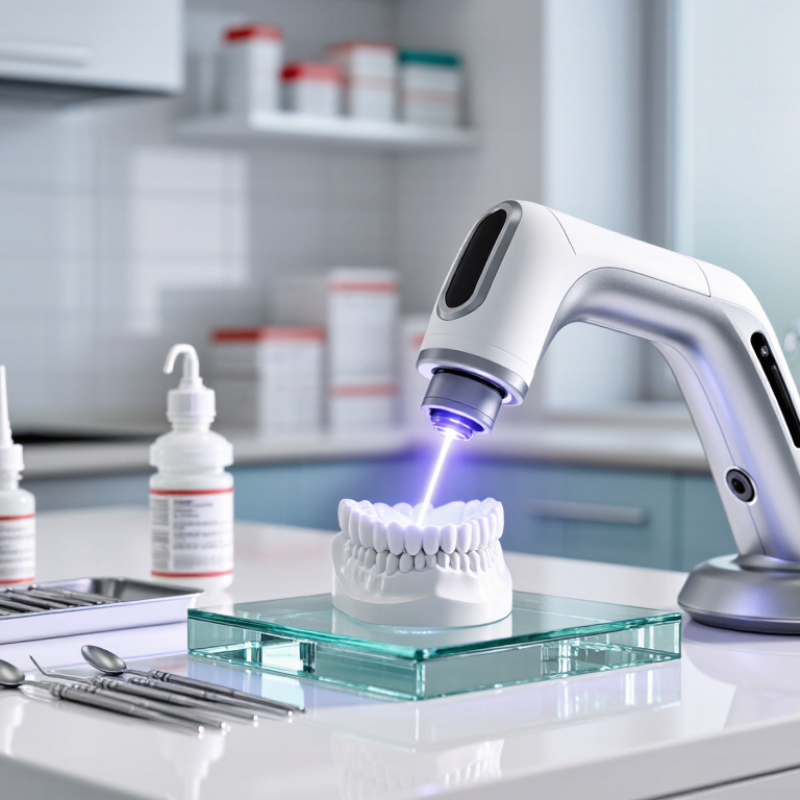
Choosing an LED curing device begins with the material’s photoinitiator, not the lamp’s appearance. Photoinitiators respond to specific wavelengths within the 385–515 nm range. A device may emit blue-violet light, yet still miss the absorption peak needed for reliable curing.
Check the technical data before testing. Look for the actual wavelength band, spectral distribution, irradiance, and curing distance. A lamp listed as “visible light” may provide incomplete information. That wording is too broad. Measure output with a calibrated radiometer when possible. Small differences in wavelength can affect surface hardness, curing depth, and final adhesion.
I once focused only on curing speed, and the deeper layer remained soft. That shortcut was wrong. Wavelength compatibility mattered more than exposure time.
A 385 nm source may suit one formulation, while another performs better near 405, 450, or 470 nm. Some materials require multiple wavelength bands. Do not assume broader coverage always means better results. Excessive energy can increase heat or damage sensitive surfaces.
Record the wavelength, irradiance, distance, and exposure time for every trial. Consistent records make performance easier to verify.
When selecting an LED curing device, start with the photoinitiator, not the lamp’s appearance. Many dental and industrial photoinitiators show strong absorption near 468 nm. A device emitting close to this peak can transfer light more efficiently into the resin. That matters when curing through a darker shade, a thicker layer, or a narrow mold.
Check the actual spectral output, not only the stated wavelength. Some devices produce a broad band, while others concentrate energy near 468 nm. Ask for measured spectral data and confirm the irradiance at the working distance. A high reading at the window may become much lower after passing through a protective barrier or curved surface. Measure it regularly.
A perfect wavelength match is not enough. Cure performance also depends on exposure time, beam uniformity, material opacity, and temperature. In practical testing, place samples at the real distance and inspect hardness at the surface and bottom.
I have seen bright, fast devices leave soft areas at the edges. That result is easy to miss. It may indicate uneven output rather than weak chemistry. Do not judge curing by surface shine alone.
Compare several batches, record the results, and allow room for doubt. The best device is the one that consistently matches the photoinitiator’s absorption profile and delivers usable energy where the material actually sits.
Choosing an LED light curing device requires more than selecting the highest number. Irradiance usually ranges from 500 to 2,000 mW/cm², but higher output does not guarantee better curing. A device delivering 500 mW/cm² for 20 seconds provides the same theoretical radiant exposure as 2,000 mW/cm² for five seconds. Real materials may respond differently.
Check the device’s wavelength range and the material manufacturer’s curing instructions. The light must match the photoinitiator’s absorption range. A high-output device may perform poorly if its spectrum is unsuitable. Measure irradiance at the light tip, not only from the display. Distance, residue, scratches, and angled placement can reduce delivered energy. Even a small gap may matter.
Temperature also deserves attention. A 2,000 mW/cm² setting can create more heat during rapid cycles, especially on thin substrates or repeated applications. Use controlled exposure times and monitor the surface when practical. Keep the light guide clean. Inspect it regularly. Calibration is easy to overlook. I have seen readings change after prolonged use, although the device still appeared normal. That experience makes independent verification worthwhile.
A sensible choice balances output, spectral compatibility, exposure control, ergonomics, and measurement reliability. More power is not always progress. Sometimes, consistency wins.
How to Choose the Right LED Light Curing Device?
Beam uniformity should be checked across the entire light tip, not only at its center. An uneven beam may leave darker resin areas undercured. In daily testing, I place the tip at a fixed distance and compare readings across several points. A calibrated radiometer helps, although readings can vary between meters. That limitation matters.
Curing depth depends on irradiance, exposure time, resin shade, translucency, and distance from the restoration. A powerful output does not guarantee deeper curing. Request test data using the materials you actually use. Check both standard and darker shades. Keep the tip close, stable, and perpendicular when possible. Small positioning errors can change results.
ISO 4049 provides useful methods for evaluating polymer-based dental materials, including depth of cure and mechanical performance. It does not automatically certify a curing device by itself. Review whether the supplier explains its testing method, specimen thickness, exposure settings, and measurement equipment. Compare results with the material manufacturer’s instructions. Do not rely on one impressive number. I would repeat the test after cleaning the light guide, because residue can reduce delivered energy. Real clinical conditions are messier than laboratory tables.
| Evaluation Dimension | What to Measure | Practical Reference Value | Why It Matters | Evidence to Request |
|---|---|---|---|---|
| Wavelength Range | Spectral output of the LED light source | Approximately 440–480 nm for camphorquinone-based materials; a broader 385–515 nm range may support materials using alternative photoinitiators | The curing light must overlap the absorption spectrum of the photoinitiator used in the resin | Measured spectral distribution, not only the nominal peak wavelength |
| Irradiance at the Tip | Radiant power delivered per unit area, measured at the light guide tip | Common dental curing modes are approximately 600–1,200 mW/cm²; high-power modes may exceed 1,200 mW/cm² when permitted by the material instructions | Higher irradiance does not automatically guarantee adequate curing if the beam is uneven or the exposure time is too short | Calibrated meter results with the supplied light guide attached |
| Beam Uniformity | Variation in irradiance across the usable exit area of the light guide | A practical screening target is a minimum-to-maximum irradiance ratio of at least 0.80 across the claimed curing area | A uniform beam helps reduce under-cured zones at the margins or peripheral areas of a restoration | 2D beam map or multi-point irradiance test; confirm the tested aperture size |
| Energy Density | Irradiance multiplied by exposure time | For example, 1,000 mW/cm² for 20 seconds delivers approximately 20 J/cm², assuming stable output | Energy density provides a better basis for comparing exposure programs than irradiance alone | Output stability data for every selectable curing program |
| Curing Depth | Depth of adequately polymerized material under a defined exposure condition | Many clinical protocols use 2 mm increments; the restorative material's instructions for use remain the controlling requirement | Greater depth can reduce the risk of inadequate conversion in incrementally placed composite, but it depends on shade, opacity, distance, and exposure time | Depth-of-cure results for different shades and exposure times, including dark or opaque shades |
| ISO 4049 Relevance | Performance of the light–material combination using the applicable ISO 4049 test methods | Use ISO 4049 methods where applicable; a commonly referenced minimum depth-of-cure requirement for restorative materials is 1.5 mm, subject to the applicable material classification and test conditions | ISO 4049 evaluates polymer-based restorative materials; it is not a standalone certification of a curing light | Independent test report identifying the resin, shade, mold dimensions, exposure time, distance, and acceptance criteria |
| Distance Tolerance | Change in irradiance and energy delivery when the tip is moved away from the restoration | Verify performance at 0 mm and at clinically realistic distances such as 2–5 mm | Access limitations, matrix bands, cusps, or posterior anatomy can prevent direct tip contact | Distance-versus-irradiance and distance-versus-depth-of-cure data |
| Output Stability | Change in irradiance during repeated exposures and over battery discharge | Prefer a variation of no more than approximately ±10% during a programmed exposure and across normal operating conditions | Stable output makes curing time more predictable and supports consistent clinical results | Repeated-cycle data, battery-state data, and calibration interval recommendations |
| Heat Generation | Temperature increase at the tip and on the irradiated surface during repeated cycles | Select thermal management that avoids uncomfortable or excessive temperature rise during the intended exposure sequence | High output and repeated exposures can increase heat transfer to the tooth and surrounding tissues | Temperature-versus-time curves for the highest power mode and repeated-use scenario |
| Light Guide Design | Tip diameter, active area, accessibility, and optical condition | The active tip should cover the restoration or be repositioned according to the material manufacturer's exposure protocol | A small or damaged tip can reduce coverage and create localized under-curing | Tip dimensions, compatibility options, cleaning instructions, and replacement schedule |
| Quality Control | Routine verification of irradiance, beam profile, timer accuracy, and physical condition | Check output at installation and periodically thereafter; repeat testing after tip damage, repair, or unusual curing results | Regular verification detects output degradation that may not be visible during normal use | Calibration certificate, maintenance procedure, compatible radiometer, and service records |
Note: Performance values should be interpreted together with the restorative material manufacturer's instructions for use. Beam uniformity and irradiance are test-dependent measurements and should be verified with calibrated equipment under documented conditions.
Choosing an LED light curing device starts with heat, not brightness. Laboratory research by Zach and Cohen found that a 5.5°C intrapulpal temperature rise could damage pulpal tissue. Therefore, review irradiance, exposure time, and heat-control data together. A powerful output is not automatically safer.
Test it clinically.
Hold the light close to a model tooth and check whether the tip becomes uncomfortably warm after repeated cycles. Battery performance also deserves scrutiny. Compare the manufacturer’s cycle rating with real treatment patterns, including standby time, charging intervals, and battery aging. A device that fails during a long appointment creates avoidable pressure. Independent testing is preferable, though it is not always available.
Shielding should be evaluated against IEC 62471 photobiological-safety principles. Confirm that the light guide, eye shield, and operator position reduce direct blue-light exposure. The American Conference of Governmental Industrial Hygienists also publishes blue-light exposure limits, which provide useful occupational context. Infection control is less visible but equally practical. CDC dental guidance recommends cleaning, disinfection, or barrier protection according to the device’s contact with patients and contaminated surfaces. Check whether detachable parts tolerate the stated process. Some housings look sealed, yet seams can retain resin or moisture. That detail is easy to miss. Record charging temperature, cleaning damage, and curing consistency during a short internal evaluation. No checklist is perfect; repeated observation often reveals weaknesses that specifications hide.
The photoinitiator determines which light wavelengths the resin absorbs best. Many materials absorb strongly near 468 nm. Matching the LED output can improve curing through dark shades, thick layers, or narrow molds.
No. Request measured spectral data, not only a wavelength label. Some devices spread energy broadly. Others concentrate energy near 468 nm. The difference can affect curing reliability.
Many devices operate between 500 and 2,000 mW/cm². Higher irradiance does not automatically produce better curing. A lower output may work well with sufficient exposure time.
Theoretically, yes. For example, 500 mW/cm² for 20 seconds equals 2,000 mW/cm² for five seconds. Real resins may respond differently because heat, opacity, and chemistry also matter.
Measure it at the light tip and at the actual working distance. Protective barriers, curved surfaces, residue, scratches, and small gaps can reduce delivered energy. The display alone may mislead you.
Place samples at the real distance and inspect both surfaces. Check hardness at the top and bottom. Examine the edges carefully. A bright surface can hide soft material underneath.
Rapid, high-output cycles can increase heat, especially on thin substrates. Uneven beams may also leave soft edge areas. More power is not always progress.
Keep the light guide clean and inspect it regularly. Measure output periodically, even when the device appears normal. Compare several batches and record results. I would still leave room for doubt.
Choosing the right Led Light Curing Device begins with identifying the materials and photoinitiators you need to cure. Confirm that the device covers the required wavelength range, typically 385–515 nm, and pay close attention to compatibility with photoinitiators whose peak absorption is near 468 nm. The light output should also match the application, with irradiance levels commonly ranging from 500 to 2,000 mW/cm². Higher intensity is not always better; consistent energy delivery is essential for reliable results.
Before making a decision, evaluate beam uniformity, curing depth, and performance against ISO 4049 requirements where applicable. A practical device should also manage heat effectively, provide sufficient battery life, and include appropriate shielding to protect users from unnecessary light exposure. In clinical or laboratory environments, easy-to-clean surfaces and infection-control features are equally important. Balancing optical performance, safety, durability, and daily usability will help ensure predictable, efficient curing.

Yaguang Machinery