Why Use a UV Adhesive Curing Lamp for Fast Curing?
Modern assembly lines demand speed, consistency, and controlled bonding. A Uv Adhesive Curing Lamp can deliver all three when the adhesive, wavelength, and exposure time match correctly. Most UV adhesives respond to wavelengths between 365 and 405 nanometers. The lamp activates photoinitiators, turning liquid adhesive into a solid polymer within seconds. That speed reduces waiting time around glass, metal, plastics, sensors, and electronic components.
Dr. J. V. Crivello, a respected photopolymerization researcher, explains, “The photoinitiator must absorb the available light and create reactive species efficiently.” This principle remains important in practical curing work. A powerful lamp alone cannot guarantee reliable results. Operators must check irradiance, curing distance, adhesive thickness, and substrate transparency. A small gap can create uneven exposure. Shadowed joints may remain soft.
The result can look perfect.
Technicians should also consider heat. Some sensitive plastics deform under excessive energy, while thick adhesive layers may cure unevenly. Measuring light intensity with a radiometer improves process control. Keeping the lamp lens clean also prevents gradual performance loss. These details seem minor, but they influence bond strength and production reliability.
There is one uncomfortable point. Faster curing is not always better. Overexposure may increase heat, discoloration, or material stress. Underexposure can cause weak bonding and delayed failure. A thoughtful curing process balances speed with complete polymerization. That balance makes the Uv Adhesive Curing Lamp a valuable production tool, rather than merely a brighter source of light.
What Is a UV Adhesive Curing Lamp?
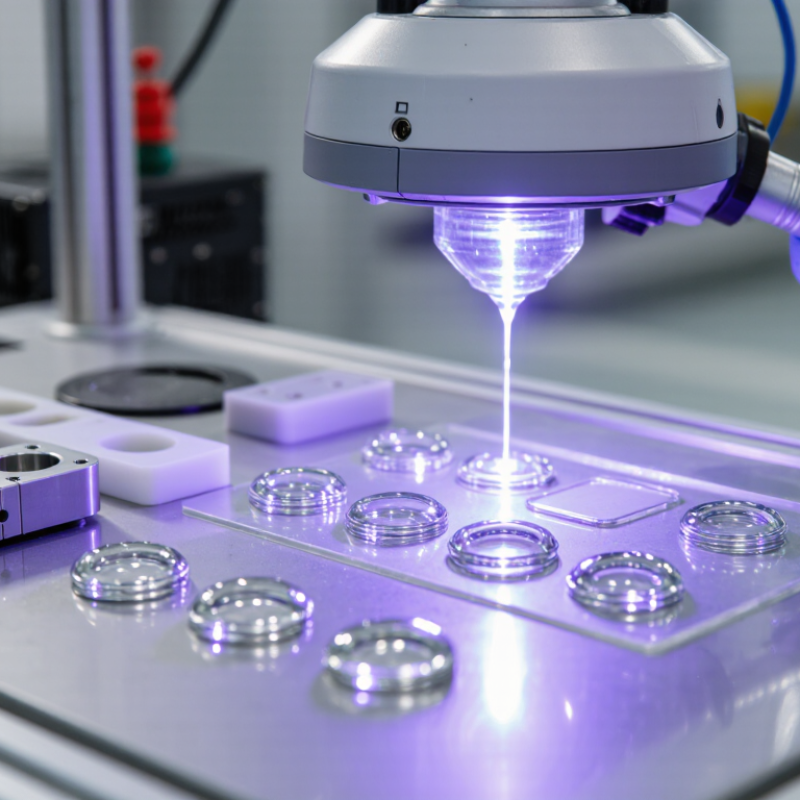
A UV adhesive curing lamp emits ultraviolet light to trigger a chemical reaction in compatible adhesives. The adhesive usually contains photoinitiators, which absorb specific wavelengths and help the material harden. Unlike ordinary drying, this process can form a solid bond within seconds or minutes, depending on the product and setup. That distinction matters. A lamp does not cure every adhesive; the formulation must match its wavelength range.
In practical use, technicians position the lamp near a thin bead of adhesive joining clear plastic, glass, or small components. Light needs a path. Opaque parts, deep gaps, or shaded edges can leave uncured material beneath the surface. Cure results also depend on lamp intensity, exposure time, distance, and adhesive thickness. Follow the adhesive maker’s technical instructions, and check the bond rather than assuming a hard surface means full curing. I have seen setups that looked complete but needed a closer inspection. UV exposure can harm eyes and skin, so use suitable shielding and avoid looking directly at the source. The lamp is a controlled curing tool, not a shortcut around careful preparation.
Why Use a UV Adhesive Curing Lamp for Fast Curing?
A UV adhesive curing lamp delivers controlled ultraviolet energy that can initiate curing within seconds when the adhesive is exposed to the correct wavelength and intensity. The chart compares indicative time-to-initial-handling values for common adhesive curing approaches.
Indicative values: UV-curable adhesive, 0.5 minutes; cyanoacrylate, 1 minute; two-part epoxy, 30 minutes; moisture-curing adhesive, 1,440 minutes. Actual performance depends on adhesive chemistry, bond-line thickness, UV transmission, lamp intensity, distance, temperature, and surface conditions.
How Does UV Adhesive Curing Work?
Why Use a UV Adhesive Curing Lamp for Fast Curing?
UV adhesive curing begins when ultraviolet light activates photoinitiators inside the adhesive. These molecules create reactive species, which link liquid resin components into a solid polymer network. Most industrial formulations respond to UVA wavelengths between 320 and 400 nanometers. The lamp must deliver enough irradiance and total energy, or the bond may remain soft beneath the surface.
The curing dose is commonly calculated as irradiance multiplied by exposure time. For example, 500 milliwatts per square centimeter for 4 seconds provides about 2 joules per square centimeter. A 2023 RadTech industry survey identified faster production and lower energy use among major reasons for adopting UV and LED curing. However, reported performance varies with adhesive chemistry, distance, temperature, and optical transmission. More power is not always better.
Watch the shadowed areas. Oxygen can also inhibit surface polymerization, leaving a slightly sticky film. In factory trials, I would check tack, hardness, and bond strength after curing, not only the timer display. A 2024 technical review in the Journal of Photopolymer Science and Technology noted that incomplete conversion can reduce long-term reliability, even when the surface looks cured. That detail is easy to miss. I still treat manufacturer cure charts as starting points, not proof. A transparent joint may cure in seconds, while a dark or thick joint needs a different formulation, longer exposure, or secondary heat treatment.
Why UV Lamps Enable Faster Adhesive Curing
Why UV Lamps Enable Faster Adhesive Curing
UV lamps accelerate adhesive curing by delivering energy directly to photoinitiators in the formulation. These molecules trigger polymerization, turning liquid adhesive into a solid network without waiting for heat to travel through the material. RadTech International North America’s UV/EB industry guidance describes UV curing as a process that can take seconds, compared with minutes or longer for conventional thermal curing. The exact time depends on lamp output, adhesive chemistry, bond thickness, and exposure.
That speed can change a production line. A small assembly may pass beneath a lamp, cure in seconds, and move straight to inspection. No long oven dwell. Less waiting between bonding and handling. The rapid process can also reduce heat exposure, which matters when joining temperature-sensitive components. Still, a fast surface cure does not guarantee a fully cured bond. Opaque parts, shadowed joints, or thick adhesive layers can block light and leave uncured material underneath.
Practical testing matters. Measure the bond, check the lamp’s wavelength and intensity, and verify cure through the joint—not just at its edges. RadTech’s technical materials also note that UV curing relies on matching the light source to the photoinitiator’s absorption range. A mismatch wastes exposure time. This part is easy to overlook. And even a well-matched setup may need adjustment as lamp distance or line speed changes.
Key Factors Affecting UV Curing Speed
Why Use a UV Adhesive Curing Lamp for Fast Curing?
Key Factors Affecting UV Curing Speed
Curing speed depends on more than lamp power. The adhesive must absorb the lamp’s wavelength, and enough UV energy must reach the full bond line. RadTech’s UV/EB technology guidance describes UV dose as irradiance multiplied by exposure time. For example, 100 mW/cm² over five seconds delivers 0.5 J/cm²; 200 mW/cm² over 2.5 seconds delivers the same nominal dose. That does not guarantee equal results. Formulation, spectrum, and oxygen exposure can change the outcome.
Distance matters. A lamp moved farther from the joint can reduce irradiance at the surface, while a thick or tinted substrate may block useful UV. Keep the light close and steady, but check the adhesive manufacturer’s recommended wavelength and dose. A quick surface cure can hide uncured material beneath it. Real setups are less tidy than charts, and dose alone can be misleading.
Tips: Measure irradiance at the adhesive, not only at the lamp. Test the actual parts and bond thickness. If the surface stays tacky, check wavelength match and oxygen inhibition before simply increasing exposure. Wear suitable UV eye and skin protection during testing.
How to Choose and Use a UV Curing Lamp Safely
A UV adhesive curing lamp can harden suitable adhesives within seconds or minutes. This speed helps reduce handling time and improves production consistency. However, fast curing does not mean every lamp will work. The adhesive and lamp must match in wavelength, intensity, and exposure time.
Check the adhesive’s technical instructions before buying a lamp. Confirm its required wavelength range, recommended irradiance, and curing depth. A lamp with higher power is not automatically better. Excessive exposure can heat delicate parts or cure the surface while leaving the center soft. Measure the lamp’s output when possible, because LEDs weaken with use. A built-in timer helps, but it cannot replace proper testing.
Safety needs attention every time. Wear UV-rated eye protection and cover exposed skin, especially during repeated work. Use a shield or enclosed curing area to block stray light. Keep the lamp stable, and never look directly at the light source. Good ventilation is also sensible when adhesive vapors are present. I once assumed a short exposure was harmless, but reflected light still reached my hands. That mistake changed my setup. Test one sample first, inspect the bond, and check for uncured adhesive beneath the surface. Keep the work area dry and uncluttered. Do not bypass the lamp’s safety controls. Some results may look acceptable at first, yet fail later under heat or movement.
Why Use a UV Adhesive Curing Lamp for Fast Curing? - How to Choose and Use a UV Curing Lamp Safely
UV curing can shorten adhesive processing time when the adhesive is formulated for the lamp’s wavelength and light reaches the bond area. The information below is general guidance; always follow the adhesive and equipment manufacturers’ instructions.
| Lamp type |
Typical emission |
Curing characteristics |
Best suited to |
Key selection point |
| UV LED |
Narrow-band output, commonly centered near 365, 385, or 395 nm |
Can cure compatible adhesives quickly; output is concentrated around the LED’s specified wavelength. |
Repeatable bench work, localized curing, and production processes designed for LED-curable materials. |
Match the LED wavelength to the adhesive’s specified activation range; check irradiance at the work surface. |
| Mercury-vapor UV lamp |
Broad-spectrum UV output; spectral distribution depends on the lamp and any filters. |
May suit adhesives requiring broader or shorter-wavelength UV output; heat and unwanted wavelengths may require controls. |
Processes whose adhesive specifications call for a compatible broad-spectrum source. |
Confirm spectral compatibility, shielding, ventilation, heat management, and lamp-specific safety requirements. |
| Low-intensity inspection or nail lamp |
Often UVA or violet LED output; wavelength and intensity vary by model. |
May be too weak, poorly matched, or uneven for a specified adhesive-curing process. |
Only applications where the adhesive instructions explicitly confirm compatibility. |
Do not assume a lamp will cure an adhesive based on appearance or advertised use alone. |
Practical Selection and Safe-Use Checklist
| Factor |
What to check |
Why it matters |
Good practice |
| Wavelength compatibility |
Adhesive technical data sheet and lamp emission wavelength or spectrum. |
Photoinitiators respond to particular wavelengths; a mismatch can leave the adhesive uncured. |
Use a source explicitly confirmed for the adhesive, rather than choosing by lamp color alone. |
| Light intensity and distance |
Irradiance at the actual curing surface, operating distance, beam uniformity, and exposure guidance. |
Intensity at the workpiece can differ from a lamp’s rated output and changes with distance, optics, and condition. |
Keep the specified distance and exposure conditions consistent; verify output with suitable measurement equipment when required. |
| Bond geometry and light access |
Adhesive depth, substrate transparency, shadows, and whether light can reach the full bond line. |
UV light may not pass through opaque or strongly UV-absorbing materials; shadowed areas may remain uncured. |
Check the adhesive’s suitability for the joint design; consider a light-and-moisture dual-cure adhesive where appropriate. |
| Exposure time and cure verification |
Recommended exposure, adhesive layer thickness, and any post-cure or testing instructions. |
Cure time varies with formulation, intensity, temperature, geometry, and substrate transmission. |
Follow the product data sheet and validate the process on representative parts; surface tack alone may not prove full cure. |
| Eye and skin protection |
UV wavelength, exposure risk, enclosure design, and protective equipment specified for the equipment. |
Direct or reflected UV exposure can injure eyes and skin; visible brightness is not a reliable measure of UV hazard. |
Use an enclosed or shielded setup where possible. Wear wavelength-rated eye protection and cover exposed skin as directed. |
| Heat, ventilation, and handling |
Lamp temperature, adhesive safety data sheet, ventilation needs, and equipment maintenance instructions. |
Some lamps and curing reactions generate heat; uncured adhesive may require specific handling precautions. |
Keep the work area ventilated as required, avoid touching hot components, and follow the adhesive safety data sheet. |
Important: There is no universal UV curing time. Use the adhesive manufacturer’s stated wavelength, irradiance, distance, and exposure conditions, and assess cure using the method specified for the application.
Conclusion
A Uv Adhesive Curing Lamp uses ultraviolet light to activate special compounds in UV-curable adhesives, helping them change from liquid to solid. During curing, the adhesive absorbs suitable UV wavelengths and forms bonds that secure the joined surfaces. Because this process can begin almost immediately when the light is applied, it often offers a faster, more controlled alternative to curing methods that rely on longer waiting times.
Curing speed depends on factors such as lamp intensity, wavelength, distance from the adhesive, exposure time, adhesive type, and the thickness or transparency of the materials being joined. For reliable results, choose a lamp compatible with the adhesive and the task, follow the adhesive maker’s curing guidance, and test the setup when needed. Use appropriate eye and skin protection, avoid looking directly at the UV source, and keep exposure within recommended limits.

 Yaguang Machinery